

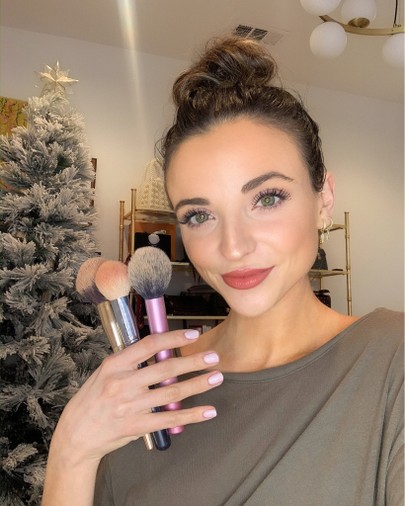

Have y’all ever watched a makeup tutorial and just been like “what is that medieval torture device thing that you’re putting WAYYY too close to your eye?!” or “wait why do I need 14 different brushes for a no makeup makeup look?” or “HOW THE HECK DID SHE JUST BLEND OUT 8 EYESHADOWS ONTO ONE EYELID?!” Let me tell ya ladies – the world of makeup has gotten com-pli-ca-TED, but it really doesn’t have to be. I love playing around with my makeup, but when I first started, I really wish I had found a basic tutorial to teach me what every product’s PURPOSE is, rather than just going to Sephora and haphazardly buying anything that glitters (turns out, too much sparkle can be a bad thing lol). I LOVE trying out new products, but these products are CLASSICS for me. So I wanted to create this super easy, step by step guide to the basics of makeup application. If you grew up without Youtube, are starting to get into makeup, or you just feel overwhelmed by the zillion products to choose from, this tutorial is for YOU! Let’s break it down, girls.
P.S. If you want the whole visual talk through experience, just head to my IGTV!
STEP 1: Primer
You know how you use primer on your walls to help the paint stick? That’s exactly what primer does on your face, too! Using a thin layer of primer helps to secure your foundation and other makeup all day long. This Tula primer is IT. Just take a small amount and warm it up on your fingers and then apply all over your face. Focus in on any areas that you know tend to get oily a little more regularly.
STEP 3: Concealer
Concealer does just that – it conceals! You can use concealer to either cover blemishes or to brighten up areas like your under eyes, etc. Try to find a shade that’s 2-3 times brighter than your foundation. I like the Nars Radiant Creamy Concealer in Vanilla. Just dab it on and then use that same slightly damp beauty blender to blend it all out. Use whatever’s left on the beauty blender on your eyelids to act as a shadow primer.
Next, I’ll use a brighter concealer like Tarte’s Alight Glow Wand to highlight parts of my face, like the bridge of my nose, my cheekbones, the center of my forehead (between the brows), and my chin – all of the areas where light naturally hits your face. This is a very natural, minimal contouring technique.
STEP 4: Setting Powder
Setting powder just locks it all down – take a big brush and sweep all over your face to make sure nothing budges. I recommend Tarte’s Translucent Powder!
STEP 5: Bronzer
I like me a LOT of bronzer . The Too Faced Chocolate Soleil bronzer is a fave – I’ve used it for YEARS. I like mine without shimmer, but it’s all just personal preference! I take a brush and sweep the bronzer in a 3 motion along the side of my face, starting at the temple, curving into the hollows of your cheekbone, and then hitting the jawline and even neck. Sometimes I’ll add the Hoola bronzer too!
STEP 6: Blush
I love the Tarte Amazonian Clay blush in “Exposed”! I personally like to focus on the apples of my cheeks for a more youthful look and then add the leftovers to the higher part of my cheekbones, but just a touch.
STEP 7: Brows
I personally don’t really mess with my brows, but I know a lot of people love to! So if you do, just make sure that you apply product using the spooly (the twisty brush thing!) or pencil in a diagonal or straight up direction. You essentially just want to follow your brow’s natural growth pattern and mimick it with either small, light strokes (if you’re using a pencil), or with small upward or diagonal motions when using a spooly-based product.
STEP 8: Eyeshadow
Girl, it is up to YOU! But here are some general rules of thumb. Start with a light base color and then add a medium shade to your crease and use a windshield wiper motion to blend, blend blend. If you wanna get crazy, you can grab another rounder brush and just blend it however you want! I pull mine to the outer corners to give myself more of a cateye effect. Next, take a darker color on the outside corners. Then I like to grab a few fun color to apply on top in the middle – in this example, I’m loving this Charlotte Tilbury pink color! I just press it on with my fingers – you could also use a wet brush though (wetting your brush usually helps glittery shadows to apply more vibrantly!). I also love this Too Faced palette!
STEP 9: Eyeliner
I like to use a pen or just a darker shadow to do a lil cat eye! Start at your lower lashline and just follow that line up! Then connect it to your upper lash line. Oila! It takes a bit of practice, but stick with it and you’ll be a pro in no time.
STEP 10: Mascara and Primer
I know it might sound extra but I’ve noticed mascara primer makes a HUGEEE difference, so I highly recommend it! Especially because a common mascara issue is flakiness, and primer will help to prevent that. Then I just apply a couple of coats of mascara (this new Surf Curl one from Tarte is AMAZING)! I like heavy upper lashes and lighter lower generally but you do you, girl! Sometimes I’ll lightly line my upper waterline to add a little extra oomph.
STEP 11: Highlighter
Highlight makes u POP gurl 😏 Just sweep some onto your cheekbones and down your nose! This Laura Geller one is SO underrated!!!
STEP 12: Lip Liner
This is pretty much self explanatory – line ya lips! I love this Lime Crime pencil – SUCH a pretty color. HOWEVER I will say that since filming this, I found this amazing hack to get fuller looking lips! Instead of doing the little “x” that I show in the video, just draw a little hoop from one side of your cupid’s bow to the other side and fill it in (then just do the rest normally). SHABAM! Honestly kind of looks like really tame lip injections lol.
STEP 13: Lipstick
Finish off with your fave lipstick and you’re done!
I know it seems like a lot of steps, but you don’t have to do all of them! I just wanted to show you what all of the different products are and ways you can incorporate them into an everyday routine 🙂 If you wanna see another variation, I use different products but the same basic steps here, too! Shake it up, girl! I hope this was helpful!!
Are you new to the makeup world? Which products do you use most often??
XOXO Dani